Informational
How to Sterilize Medical Instruments
Aug
The Importance of Sterilization
Instrument Processing Area
- Sterilization
- Decontamination
- Storage
- Packaging
Such a design of the processing area helps separate sections where contaminated items are processed and packaged from areas the clean items are sterilized and moved for storage.
There should be a sink for hand-washing where the instrument processing work-space is placed. There should also be drawers/cabinets, electrical service that enables adequate lighting, easily cleanable floors and water and heat-resistant counter-tops. Proper ventilation is also of the essence as the room temperature needs to be comfortable and vapors and odors from waste and chemicals need to be eliminated. Avoid the use of portable fans as these can quickly recirculate microbes from various surfaces such as floors. With all these steps taken, the workflow should be smooth and should encompass all the important aspects of sterilization that are essential to the welfare of patients, staff, and physicians.
The Sterilization Workflow
Transportation of Instruments to the Sterilization Area
At this stage, all contaminated instruments are transported to the sterilization center to minimize the risk of exposure of patients and staff to contaminants. Typically, after the instruments have been used in the procedure room, they are packed in a rigid, leak-proof container and transported by a member of staff that is dressed in protective equipment.
Sorting of Instruments and Waste Disposal
It is during this step that disposable items are separated from those that need to be sterilized for reuse. Different types of sterilization may be required for various instruments; for instance, stainless steel instruments cannot be put together with carbon steel instruments. Some instruments may need soaking in a holding solution before actual sterilization. Any extra waste will need to be disposed according to the EPA requirements, in a bio-hazard waste receptacle.
Rinsing and Ultrasonic Cleaning
Before sterilization, personnel should make use of machines such as an ultrasonic cleaner before sterilization. By using this hands-free approach, the staff can be protected from injury and, the ultrasonic cleaning is more efficient at accessing crevices, effective and safe for personnel. It is crucial that the staff ensures that the bio-burden is washed off and instruments are properly rinsed before being placed in the instrument washer. An assessment of the instruments should be done after washing to ensure that there is no damage and to replace the instruments that have been destroyed.
The ultrasonic cleaning basket works to ensure the proper positioning of these instruments during the ultrasonic cleaning. It keeps the instruments in the ultrasonic solution while ensuring that they do not hit the bottom of the tank and potentially break. This process cleans off most of the micro-organisms but should not be considered the ultimate substitute for sterilization and disinfection. Staff should keep away from solutions such as disinfectants, detergents, and other liquids that are not exclusively ultrasonic solutions.
Rinsing with Clean Water and Drying of the Instruments
After ultrasonic cleaning, the instruments should be rinsed and dried. Typically, they are rinsed in clean water and dipped in distilled water depending on the instrument. The instruments are then left to air dry or dried using an instrument dryer. They can then be lubricated using appropriate dust inhibitors according to the manufacturer’s instruction.
Pouching and Wrapping of Instruments
To achieve the ultimate goal of infection control, instrument re-contamination should be avoided. This is done by properly packaging the items in wraps and pouches. The packaging used for each instrument should be compatible with the type of sterilization used.
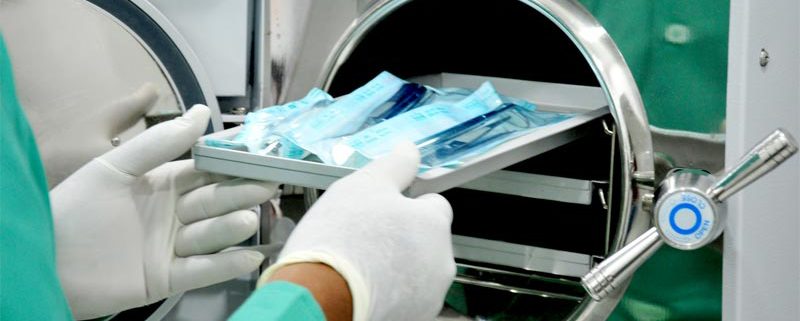
Sterilization and Drying
Sterilization comes in different forms including:
a) Steaming (autoclaving)
This is the recommended and most used type of sterilization in most medical practices. This is done in a sterilization chamber. To achieve the best results, the air that remains in the chamber after the door is closed is removed through gravity displacement in most cases. A failure to remove the air may result in incomplete sterilization of instruments.
b) Pre- and Post-Vacuum Sterilization
Sometimes, the pre- and post-vacuum sterilizer is used to achieve sterilization. Before and during the heating phase, the sterilizers use a vacuum pump to draw out any air from the heating chamber. At the end of the sterilization, the vacuum pump is once again used to shorten the drying time of the instruments. This method removes more air from the sterilization chamber because it relies less on gravity.
c) Steam-Flush-Pressure -Pulse
In place of the mechanical valve used by the gravity displacement sterilizer, this model makes use of an electronically operated valve. Because of the valve’s electronic nature, it can be used as appropriate in the dispelling of air from the chamber. This sterilizer is not only low maintenance but also has the benefits of being most efficient in regards to air expulsion
Storage
After sterilization, instruments should be stored in a place with minimum air flow. The instruments should also remain sealed until required for use to avoid contamination. The drawers and shelves where the packaging is left should stay clean. When needed, the instruments should be assessed to ensure no damage is done to the packaging.
Tips
• Ultrasonic Cleaner – Understand the cleaning needs of your practice and use them to choose a cleaner. Your choice will depend largely on the types of procedures and number of patients. There are many options in regards to size, ease of use and quality. Choose a cleaner that is less noisy, fast and efficient. A review of the coverage of cavitation uniformity and transducer power will be helpful. A higher transducer power and a uniform cavitation coverage mean the machine will clean the instruments well.
• Sterilizer – A fast and efficient sterilizer is ultimately what every practice needs. As such, when buying a sterilizer, consider the ease of use and how controllable the system can is; if it can allow different cycle creation. Once set, a sterilizer should be able to finish the process without further instruction.
• Follow the manufacturer’s instructions to ensure efficiency of the equipment during its operation and use.
• Use chemical indicators in the cycle to ensure the sterilizer has reached the appropriate conditions to achieve its purpose-sterilization.
• Take care not to pierce the packaging instruments as this may interfere with sterilization.